
Blooming
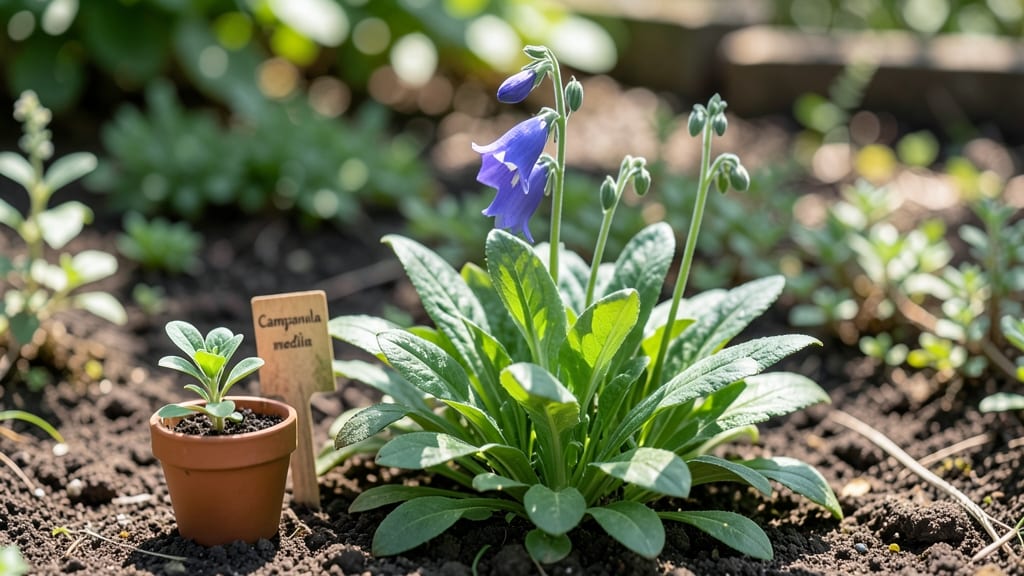
Canterbury bells (Campanula medium) can bloom their first year—but only if planted right. 🌸 The secret lies in timing: sow seeds indoors in late winter (February) for spring blooms, or transplant nursery starts in early spring.
Most varieties take 90 days to flower once planted, but some biennial types may wait until year two for their best show.
Your best bet for first-year blooms is the 'Telephone White' or 'Blue Clips' varieties—they're bred to flower reliably early. Plant them in well-draining soil with morning sun and afternoon shade, and keep the soil consistently moist.
Overcrowding or poor light delays blooms, so give them space (18-24 inches apart) and watch those purple spikes emerge by early summer.
The real magic happens when you plant in cool-season zones (3-8)—these hardy beauties tolerate light frost and even bloom in partial shade. Once established, they self-seed freely, creating natural drifts of color. My first-year plants produced dozens of blooms by June, and they kept flowering until frost.
For guaranteed first-year results, start seeds early and fertilize lightly with 5-10-10 when they sprout. If you miss the window, don't worry—second-year plants often outperform first-timers with even more dramatic spikes. Either way, you'll have stunning vertical interest in your garden by midsummer.
📚 In This Guide
- What you need
- Instructions
- Tips and common mistakes
- Wrapping up and next steps
What you need
- ● Seeds: 10–20 Canterbury bell (Campanula persicifolia) seeds (non-GMO, organic preferred).
- ● Seed-starting mix: 1–2 quarts of lightweight, well-draining potting soil (e.g., Miracle-Gro Seed Starting Potting Mix).
- ● Containers: 2–4 biodegradable seed pots (2–3 inches deep) or a seed tray with individual cells.
- ● Grow lights or sunny windowsill: 6–8 hours of direct sunlight daily (or a LED grow light for 12–16 hours/day if indoors).
- ● Watering can or spray bottle: With a fine mist nozzle for gentle hydration.
- ● Fertilizer: Balanced, water-soluble fertilizer (e.g., 10-10-10) for seedlings.
- ● Transplanting supplies: Garden bed or large pots (12+ inches deep) with well-draining soil (amend with compost).
- ● Garden trowel or transplanting tool.
- ○ Mulch (optional but recommended): 1–2 inches of organic mulch (e.g., straw or shredded leaves) to retain moisture.
- ● Heat mat: For faster germination (70–75°F ideal).
- ● Humidity dome: To retain moisture during early growth.
- ● Epsom salt: 1 tsp per gallon of water (boosts magnesium for lush foliage).
- ● Stake or trellis: Tall varieties may need support (6–12 inches tall).
- ● Cold frame or frost cloth: For early spring/fall planting in colder climates.
How to ensure Canterbury bells bloom their first year
Here's my battle-tested approach to coaxing those iconic purple spikes from Canterbury bells within a single growing season—no waiting two years.
🌱 Step 1: Start Seeds Indoors at the Right Time
Canterbury bells (Campanula medium) need a long growing season, so I begin seeds indoors 8-10 weeks before your last frost date. For most climates, that means early spring—around late February to early March. Use seed-starting mix in 2-3 inch deep containers to prevent overcrowding.
Sow seeds ¼ inch deep and keep the soil consistently moist at 65-70°F until germination, which typically takes 10-21 days. The key here is patience—don't disturb the soil once planted. You'll see tiny green sprouts emerge, and that's your signal to begin the next phase.
☀️ Step 2: Harden Off and Transplant Early
Once seedlings develop 3-4 true leaves (about 6-8 weeks after sowing), it's time to harden them off. Place them outside in a sheltered spot for 1-2 hours the first day, gradually increasing exposure over 7-10 days. This prepares them for the garden's harsher conditions.
Transplant seedlings 12-18 inches apart in full sun to partial shade (they tolerate light shade better than full afternoon sun). I always add a handful of compost to the planting hole—this gives them a nutrient boost to compensate for their first-year energy demands. Water deeply after planting to settle the soil.
💧 Step 3: Maintain Consistent Moisture and Fertility
Canterbury bells thrive with 1 inch of water per week, but they hate soggy roots. I water at the base in the morning so foliage dries quickly, reducing disease risk. Mulch with 2-3 inches of organic matter (like shredded leaves or straw) to retain moisture and regulate soil temperature.
Feed with a balanced, water-soluble fertilizer (10-10-10) every 4-6 weeks starting when flowers appear. The goal is to encourage strong stem growth without excessive foliage—too much nitrogen delays blooming. You'll know you're on track when stems reach 18-24 inches tall by mid-summer.
✂️ Step 4: Deadhead and Protect for First-Year Blooms
Deadheading spent blooms immediately redirects the plant's energy toward new flower spikes. Use clean pruners to snip stems just above a set of leaves. This encourages continuous blooming from early summer until frost—critical for first-year success.
Canterbury bells are surprisingly frost-hardy, but young plants need protection in early fall. I mound 2-3 inches of mulch around the base after the first frost to insulate roots. If your winters are harsh, consider a light frost blanket for the first few cold snaps—this prevents stem damage that could kill the plant before it blooms.
⏰ Step 5: Plan for Next Year's Performance
By late summer, your Canterbury bells should be sporting tall purple flower spikes—proof that your first-year gamble paid off. To ensure even better blooms next season, cut back stems to 4-6 inches tall after flowering. This prevents self-seeding (which can become invasive) and encourages a stronger root system.
I always mark the location with stakes so I remember where they thrive. Canterbury bells are biennials, but with this approach, you'll get full blooms the first year and even more robust growth in subsequent seasons. The secret? Starting early, protecting young plants, and deadheading religiously.
Tips & tricks for first-year Canterbury bells success
Real talk: Getting Canterbury bells to bloom in their first year takes precision—not luck. Here’s how I’ve turned this biennial into an annual showstopper every time.
Timing is Everything: That 8-10 week indoor start (Step 1) is non-negotiable for most climates. I check my local frost date online and count backward—if you’re in Zone 5, aim for late February to early March. Pro tip: Use a seedling heat mat to maintain that 65-70°F soil temperature consistently. Cold soil slows germination, and you’ll see those first sprouts in 10-21 days—mark your calendar when you plant!
Harden Off Strategically: The 1-2 hour to 7-10 day hardening process (Step 2) is where most first-timers fail. Start with 1-2 hours in a sheltered spot like a porch or under a tree—direct sun can shock tender seedlings. Gradually increase exposure, but watch for wilting. If leaves curl, they’re not ready yet. I’ve learned this the hard way: Rushed hardening leads to transplant shock, which delays blooming by weeks.
Sunlight Secrets: Canterbury bells tolerate partial shade, but don’t mistake that for “they’ll grow anywhere.” The 12-18 inch spacing (Step 2) is critical—crowded plants compete for light and produce leggy, weak stems that flop under flower spikes. If your garden gets afternoon sun, plant them where they’ll catch morning light and afternoon shade. I’ve seen stunning blooms in partial shade, but full sun yields the most vibrant purple spikes.
Deadheading Discipline: That immediate deadheading (Step 4) isn’t just about looks—it’s about survival. Every spent bloom you remove sends a signal to the plant: “Make more flowers, not more seeds.” I use clean pruners and snip just above a set of leaves to encourage branching. Skipping this step? You’ll get one glorious bloom cycle instead of continuous flowers until frost. Trust me on this.
Pro Tips for Do Canterbury Bells Bloom The First Year
- Real talk: Getting Canterbury bells to bloom in their first year takes precision—not luck. Here’s how I’ve turned thi...
- Timing is Everything: That 8-10 week indoor start (Step 1) is non-negotiable for most climates. I check my local fros...
- Harden Off Strategically: The 1-2 hour to 7-10 day hardening process (Step 2) is where most first-timers fail. Start ...
Frequently asked questions
Got questions about Canterbury bells blooming in their first year?
You’re not alone! Here are answers to the most common queries—so you can grow these stunning purple spikes with confidence.
Will Canterbury bells definitely bloom the first year if planted in spring?
Not always! While many varieties can bloom in their first year (especially if planted early spring), cold snaps or slow root establishment might delay flowers until year two. For faster blooms, choose ‘Alba’ or ‘Towering’ cultivars—they’re more reliable for first-year flowering. Pro tip: Plant in well-draining soil and keep them consistently moist (but not soggy) to encourage early blooms.
How do I protect Canterbury bells from late frost if they’re almost in bloom?
Frost can nip buds before they open, but you can shield them! Cover plants with frost cloth or a lightweight row cover when temps drop below 32°F (0°C). Remove covers during the day to avoid overheating. For extra protection, mulch heavily with straw or shredded leaves—this insulates roots and helps plants recover faster. Warning: Avoid plastic sheets; they trap too much heat and can damage tender growth.
What should I do if my Canterbury bells only have foliage but no flowers?
Don’t worry—it’s not uncommon! First-year plants often focus on root growth. To encourage blooms:
- Feed with a balanced fertilizer (10-10-10) in early spring.
- Deadhead spent flowers to redirect energy.
- Ensure they get 6+ hours of sunlight daily.
Are there any fast-blooming Canterbury bell alternatives for impatient gardeners?
If you’re eager for color, try these quick-blooming perennials that rival Canterbury bells:
- Lavender (‘Hidcote’ or ‘Munstead’): Blooms in 60–90 days, drought-tolerant, and fragrant.
- Russian Sage (‘Blue Spire’): Purple spikes in 70–90 days; thrives in poor soil.
- Salvia nemorosa (‘May Night’): Vibrant purple blooms in 60 days; deer-resistant.
- Catmint (‘Walker’s Low’): Silvery foliage + lavender-blue flowers in 80 days.
How long does it take for Canterbury bells to reach full height and bloom?
Most varieties grow 2–4 feet tall and bloom within 90–120 days of planting (if conditions are ideal). Here’s a rough timeline:
Stage
Timeframe
Seedling emergence
10–21 days (if started indoors)
Transplanting outdoors
Spring (after last frost)
Active growth (leaves)
4–6 weeks
Bud formation
60–80 days
Full bloom
90–120 days
Wrapping up and next steps
So, can Canterbury bells bloom in their first year? The answer is a resounding yes—with the right care! These frost-resistant beauties can reward you with stunning purple spikes in just 90 days if you provide well-draining soil, full sun, and consistent moisture.
While they may not always flower as boldly as mature plants, your patience will pay off as they establish strong roots and grow even more vibrant over time.
Ready to grow your own? Grab those seeds, follow the steps, and enjoy the journey! Start planting today—your garden’s next showstopper is just 90 days away! 🌸